Welcome back to part 2 of the Android Plugin tutorial series. This time, our C++ plugin will communicate directly with some Java code that is stored inside a Java Archive (JAR) using the Java Native Interface (JNI). Since Java is the preferred language for Android, many 3rd party plugins like ad frameworks or payment services will come exclusively as Java code, either as source code or *.jar package. Learning how to communicate across all 3 languages (Lua, C++ and Java) is essential in order to take full advantage of the Android ecosystem.
Java to JAR
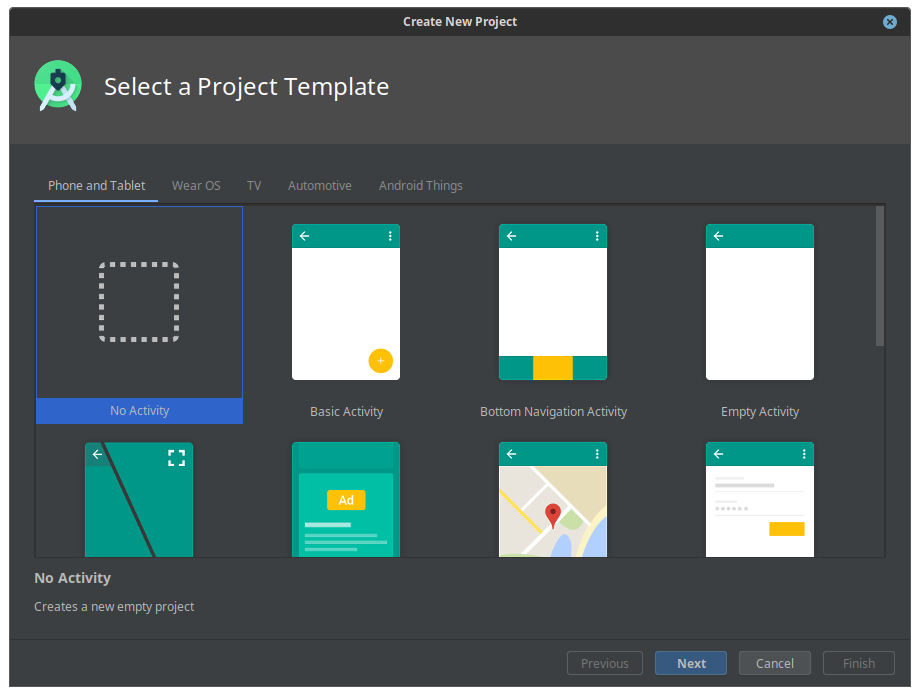
To keep this tutorial as easy to understand as possible, we will be making our own Java class to communicate with. Open Android Studio and create a new project without an activity:
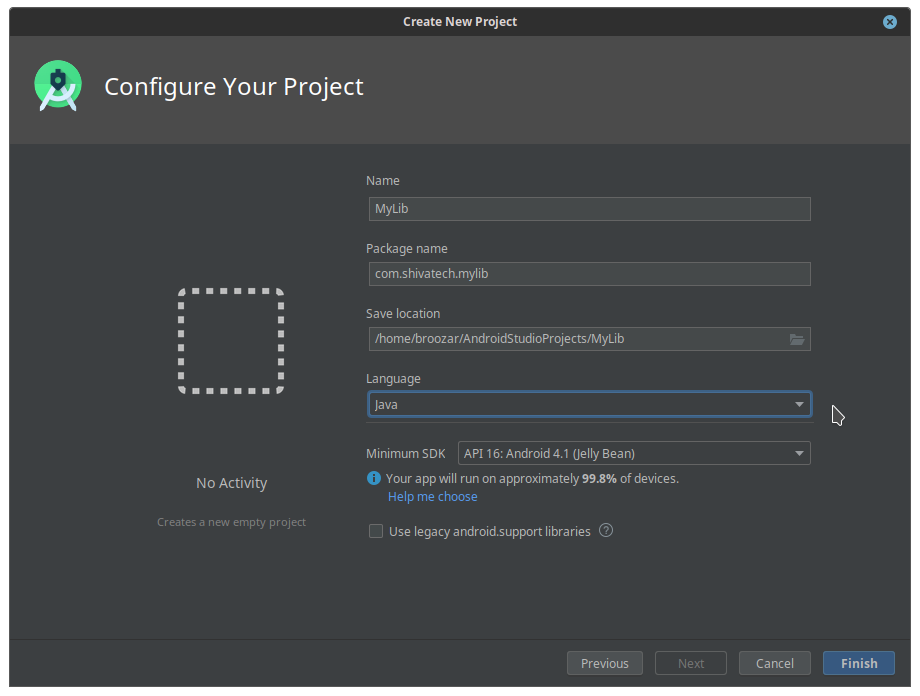
Make sure the language is set to Java and the SDK matches your other build settings:
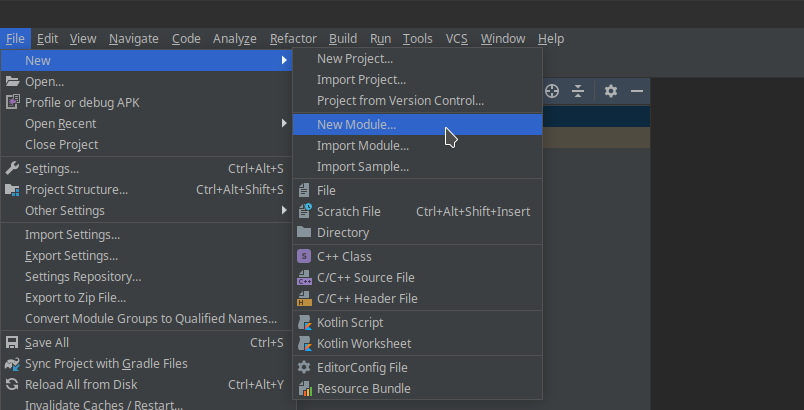
Next, you need to add a new module, which will become our JAR library. Go to File > New > New Module…
… then choose Java or Kotlin Library:
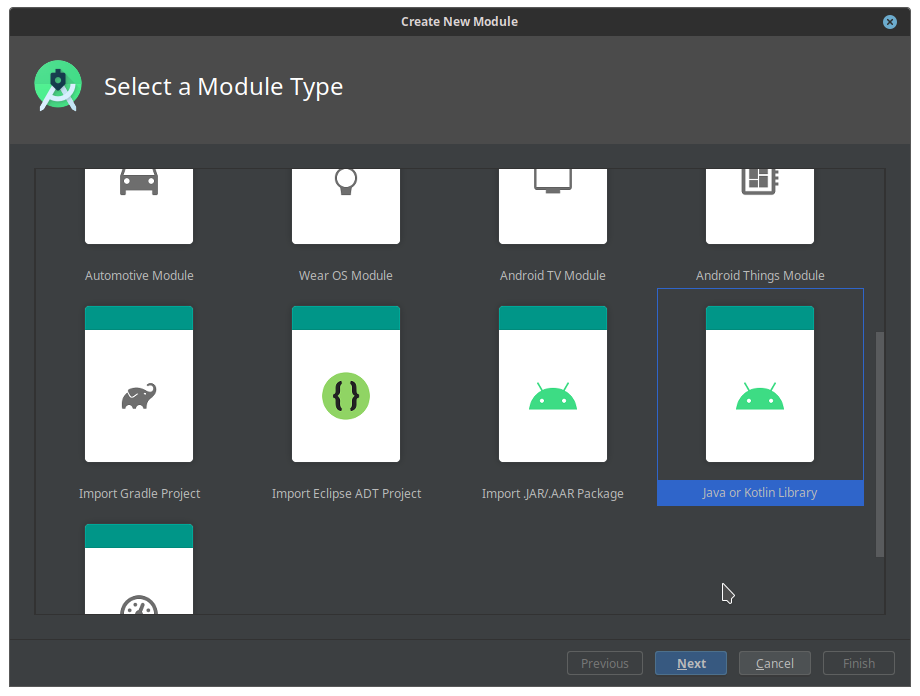
Pick a good class name and set the language to Java.
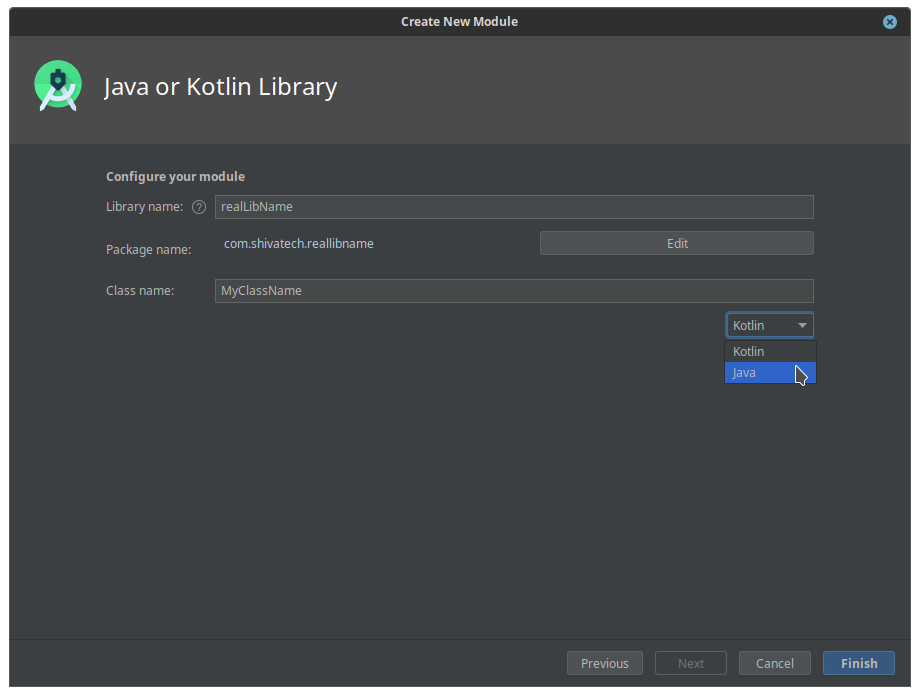
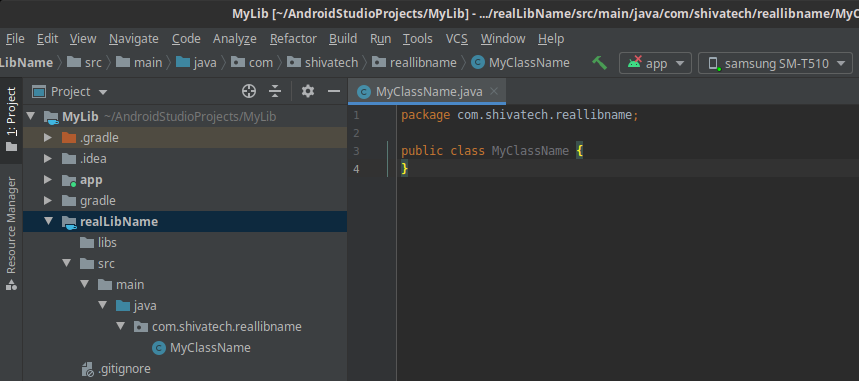
You will now have an empty class in its own folder structure:
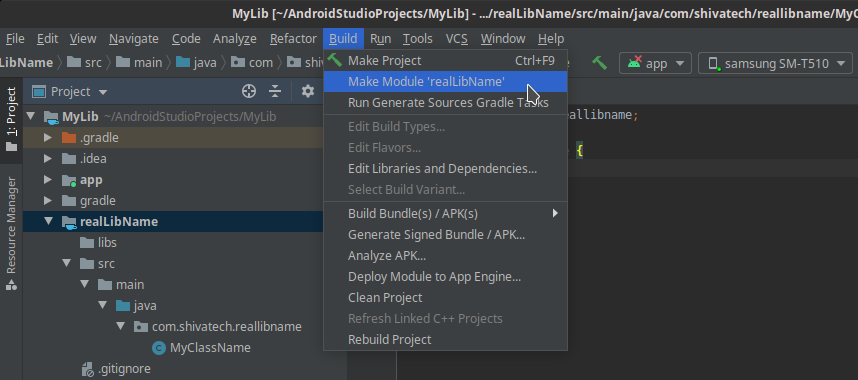
To build this module and generate a JAR, select the module in the project view and go to Build > Make Module. Do not build the entire java project, only the module!
The demo Java project
For this tutorial, I have created a class Java1 inside the package com.shivatech.jni1 with a number of test methods. Keeping track of these names will become important shortly.

As you can see, we will be testing static methods, instance methods, Java system calls (println()), string concatenation, basic math, parameter handling and return values. It is important to note that you will need to declare every external class you are using through an import. This is the case even for standard classes like Java’s default String, otherwise the JAR will crash your ShiVa plugin with a “signature not found” error message.
ShiVa multi-platform plugin setup
ShiVa is a multi-platform development environment. Even though the plugin is targeted at Android, we still have to develop the game mainly on Windows, Mac or Linux, where the plugin should not crash and ideally still return something useful, even though the Android system files and frameworks are not available. This is achieved in two ways. First, platform-specific plugin code is sorted into platform-specific folders. ShiVa plugin projects have that structure already set up for you: Platform-independent code lives directly in Sources/, while platform-specific code resides under Sources/Platforms/$Platformname.
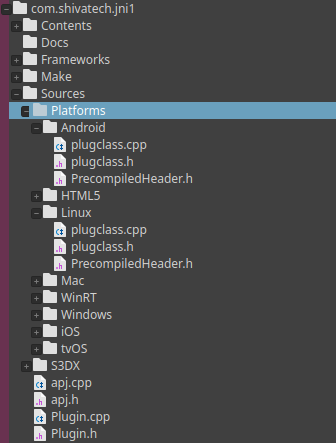
The most important files here are:
Sources/Plugin.h and .cpp: general plugin setup code (cross-platform)
Sources/apj.h and .cpp: main plugin file for our “apj” demo plugin
(cross-platform)
Sources/Platforms/Android: all Android-specific C++ code (target platform)
Sources/Platforms/Linux: all Linux-specific C++ code (my main development platform)
Your main plugin CPP file is the point where cross-platform and platform-independent code meets – apj.cpp in our case. In order to select the correct code for each target platform, you need to make use of preprocessor directives. To differentiate between Android and desktop systems for instance, you would add the following to apj.cpp after the main includes:
// apj.cpp line 10
#ifdef __ANDROID__
    #include <jni.h> // Android-only include: JNI header
    #include "Platforms/Android/plugclass.h"
#endif

#ifdef __LINUX__
    #include "Platforms/Linux/plugclass.h"
#endif

#ifdef __MAC__
    #include "Platforms/Mac/plugclass.h"
#endif

#ifdef WIN32
    #include "Platforms/Windows/plugclass.h"
#endif
Since I designed the plugin so that all plugclass.h/cpp files define a class called PlugClass() with mostly the same interface, I can now instantiate this “universal” class pointer below our platform-specific includes:
// apj.cpp line 34
PlugClass * _pc = new PlugClass();
ShiVa boilerplate code for Android
Android expects a small bit of boilerplate code in your plugin to make communication between C++ and the Java VM easier. We need to add the following snippets:
// Plugin.h line 53
virtual void SetJavaVM ( void * _pJavaVM );
void * pJavaVM;
// Plugin.cpp line 21
// replace PlugtestAndroJNI:: with your own namespace
void PlugtestAndroJNI::SetJavaVM ( void * _pJavaVM ) {
    pJavaVM = _pJavaVM ;
}
Furthermore, we need to add a static function which determines the current JNI environment. We need to extend our previous preprocessor definition like so:
// apj.cpp line 10
// replace PlugtestAndroJNI:: with your own namespace and apj_ with your own prefix
#ifdef __ANDROID__
    #include <jni.h>

    static JNIEnv * apj_GetJNIEnv() {
        JNIEnv * pJNIEnv;
        if ( PlugtestAndroJNI::GetInstance()->pJavaVM && ( ((JavaVM*)(PlugtestAndroJNI::GetInstance()->pJavaVM))->GetEnv((void**) &pJNIEnv, JNI_VERSION_1_4 ) >= 0 ) ) {
            return pJNIEnv;
        }
        return nullptr;
    }

    #include "Platforms/Android/plugclass.h"
#endif
At this point, there are two tricks I would like to share which helped me save some time and nerves while writing this tutorial. Since you are not developing on Android, your IDE will grey out the whole __ANDROID__ block and not check it for errors. You can force the code parser to check your code by simply adding #define __ANDROID__ over #ifdef __ANDROID__ – just remember to comment it out before compiling!
The second trick deals with NDK-includes like jni.h, which my IDE was not able to locate on its own. This meant that code checking, syntax highlighting and code prediction was not available. Rather than setting include paths, I found it easier to just tell the IDE the absolute path to my NDK headers. Again, remember this must be commented out before compiling:
// real include:
#include <jni.h>

// IDE include hack with absolute path, must be commented out:
#include "[...]/android-sdk/ndk/21.2.6472646/toolchains/llvm/prebuilt/linux-x86_64/sysroot/usr/include/jni.h"
C++ plugin class requirements
Compared to your Desktop platforms, your Android plugin class needs to offer at least 3 additional things. Most importantly, a pointer to the current JNI environment is needed. Since the plugin cannot determine this pointer on its own, it is necessary to create an init() function which forwards all necessary information from apj.cpp to plugclass.cpp. Thirdly, the plugin needs to know the fully qualified name of the Java class you want to communicate with. We can define these items in plugclass.h:
// Android/plugclass.h line 6
class PlugClass {

private:
    JNIEnv * _JNIEnv;
    jclass _JNIClass;

public:
    PlugClass();
    bool init(JNIEnv * pJNIEnv);
// […]
Since this init() method is only available and necessary on Android, you can use another preprocessor directive (#ifdef #else) when calling apj.init() in apj.cpp:

init() takes the JNIEnv pointer as argument and stores it in the class. Furthermore, you need to locate your Java class by stating the package and class name:
// plugclass.cpp line 30
bool PlugClass::init(JNIEnv * pJNIEnv) {
    // get environment
    if (pJNIEnv == nullptr) return false;
    _JNIEnv = pJNIEnv;

    // get main class
    jclass tmp = _JNIEnv->FindClass("com/shivatech/jni1/Java1");
    _JNIClass = (jclass)_JNIEnv->NewGlobalRef(tmp);
    if (!_JNIClass) return false;
}
Calling static Java code from ShiVa
Static Java methods can be called without creating a class object first. In its simplest form, a static method call looks like this:
// plugclass.cpp line 52
void PlugClass::simpleLogStatic() const {
    jmethodID pJNIMethodID = _JNIEnv->GetStaticMethodID(_JNIClass, "jLog", "()V");
    _JNIEnv->CallStaticVoidMethod(_JNIClass, pJNIMethodID);
    return;
}
First, you must locate the method by its signature through GetStaticMethodID(). In the example above, we are looking for the method jLog() with a signature of ()V. JNI signatures may look strange at first glance, but are really not that difficult. Everything inside the brackets is an argument, and everything to the right of the brackets is the return type. You can get all the signature codes either from the JNI documentation or from this handy cheat sheet:
Type Signature			Java Type
Z				boolean
B				byte
C				char
S				short
I				int
J				long
F				float
D				double
L fully-qualified-class ;	fully-qualified-class
[ type				array[]
Our signature of ()V takes no arguments and returns void. After you have successfully located the method, you can execute it. Since we return void here, we will use CallStaticVoidMethod(), but be aware that every return type requires its own method call here. For instance, our math function looks like this:
// plugclass.cpp line 72
int PlugClass::add (float && num1, float && num2) {
    jmethodID pJNIMethodID = _JNIEnv->GetStaticMethodID(_JNIClass, "jAdd", "(FF)I");
    return _JNIEnv->CallStaticIntMethod(_JNIClass, pJNIMethodID, num1, num2);
}
The signature of (FF)I means that the method jAdd() takes two floats and returns an int, so naturally the call to CallStaticVoidMethod() must be replaced with CallStaticIntMethod().
Finally, if you want to send anything else but primitive data types, you need to state the fully qualified class name for every argument and return type. For instance, this becomes necessary every time you want to send strings:
// plugclass.cpp line 78
const char * PlugClass::sOK (const char * in) {
    jmethodID pJNIMethodID = _JNIEnv->GetStaticMethodID(_JNIClass, "jOK", "(Ljava/lang/String;)Ljava/lang/String;");
    auto r = _JNIEnv->CallStaticObjectMethod(_JNIClass, pJNIMethodID, _JNIEnv->NewStringUTF(in));
    return _JNIEnv->GetStringUTFChars((jstring)r, 0);
}
The method jOK() takes a string and returns a string, which results in this signature:
"(Ljava/lang/String;)Ljava/lang/String;"
The L and ; are both important and have no whitespace before or after the symbol.
String handling
A quick note on handling Strings. ShiVa strings are UTF-8, Java strings are handled internally as UTF-16, but the Android default character encoding is UTF-8 again. To convert successfully between all the different formats, use NewStringUTF() to turn a ShiVa string into a Java string and GetStringUTFChars() to convert a Java string back into a const char * which ShiVa can use. Explicit casting to jstring might be necessary, see above.
Calling object Java code from ShiVa
Calling object code is similar, however you need to create a class object first by calling its constructor:
// plugclass.cpp line 60
void PlugClass::simpleLogObject() const{
    if (_checkFailed()) return;
    jmethodID ctor = _JNIEnv->GetMethodID(_JNIClass, "", "()V");  // FIND OBJECT CONSTRUCTOR
    jobject myo = _JNIEnv->NewObject(_JNIClass, ctor);
    if (myo) {
        jmethodID show = _JNIEnv->GetMethodID(_JNIClass, "ojLog", "()V");
        _JNIEnv->CallVoidMethod(myo, show);
    }
    return;
}
Trigger a ShiVa event from Java
You can also use Java to send an event notification to a ShiVa AI in the CurrentUser’s stack. This again requires a bit of setup and boilerplate code. Let’s start in ShiVa by creating an event handler target which accepts a message string:
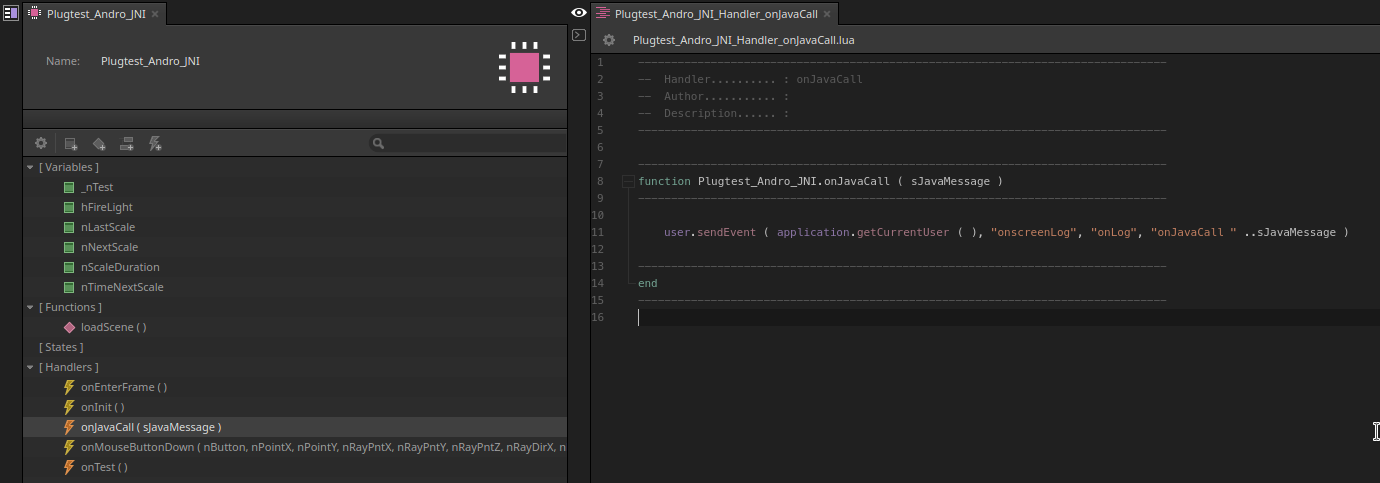
To call this handler from a ShiVa C++ plugin, you would normally do something like this:
S3DX::user.sendEvent(S3DX::application.getCurrentUser(), sAI, sEvent, sMessage);
Java cannot call this function directly. Instead, you must wrap this command in a static void function. The first two arguments are required by JNI and automatically added to the function signature. Arguments 3 to 5 represent sAI, sEvent and sMessage from the user.sendEvent() call.
// plugclass.cpp line 12
// replace apj_ with your own prefix
static void apj_msg (JNIEnv * jE, jclass jC, jstring sAI, jstring sEvent, jstring sMsg) {
    const char * cAI    = jE->GetStringUTFChars(sAI, 0);
    const char * cEvent = jE->GetStringUTFChars(sEvent, 0);
    const char * cMsg   = jE->GetStringUTFChars(sMsg, 0);
    S3DX::user.sendEvent(S3DX::application.getCurrentUser(), cAI, cEvent, cMsg);
}
Please note that this implementation is not recommended for production code, since calling S3DX API functions outside of a valid S3DX context can lead to hard crashes. On top of this, the function is leaking memory for the strings. There are several ways to fix this, one of which we will discuss in the next part of this tutorial series. But for this tutorial, the code will work.
Each function of that type needs to be registered as JNINativeMethod. The easiest way to do this is through an array. Notice how the JNI function signatures makes an appearance once again, also note how we are only stating 3 arguments instead of 5 since JNIEnv and jclass are added automatically in C++:
// plugclass.cpp line 19
// replace apj_ with your own prefix and adjust signature
static JNINativeMethod apj_methods[] = {
    {"apj_msg", "(Ljava/lang/String;Ljava/lang/String;Ljava/lang/String;)V", (void *)apj_msg}
};
Finally, call RegisterNatives() to announce your native C++ functions to Java. The best place to do this is inside the init() method:
// plugclass.cpp line 41
// replace apj_ with your own prefix
    if (_JNIEnv->RegisterNatives(_JNIClass, apj_methods, sizeof(apj_methods) / sizeof(apj_methods[0])) < 0) return false;
If you declare the apj_msg() method in Java as private static native void and use the same 3 argument signature, you can make calls to the external C++ function of the same name as if it was any other Java call. The example below sends a message to ShiVa through apj_msg() by calling the jTriggered() method:

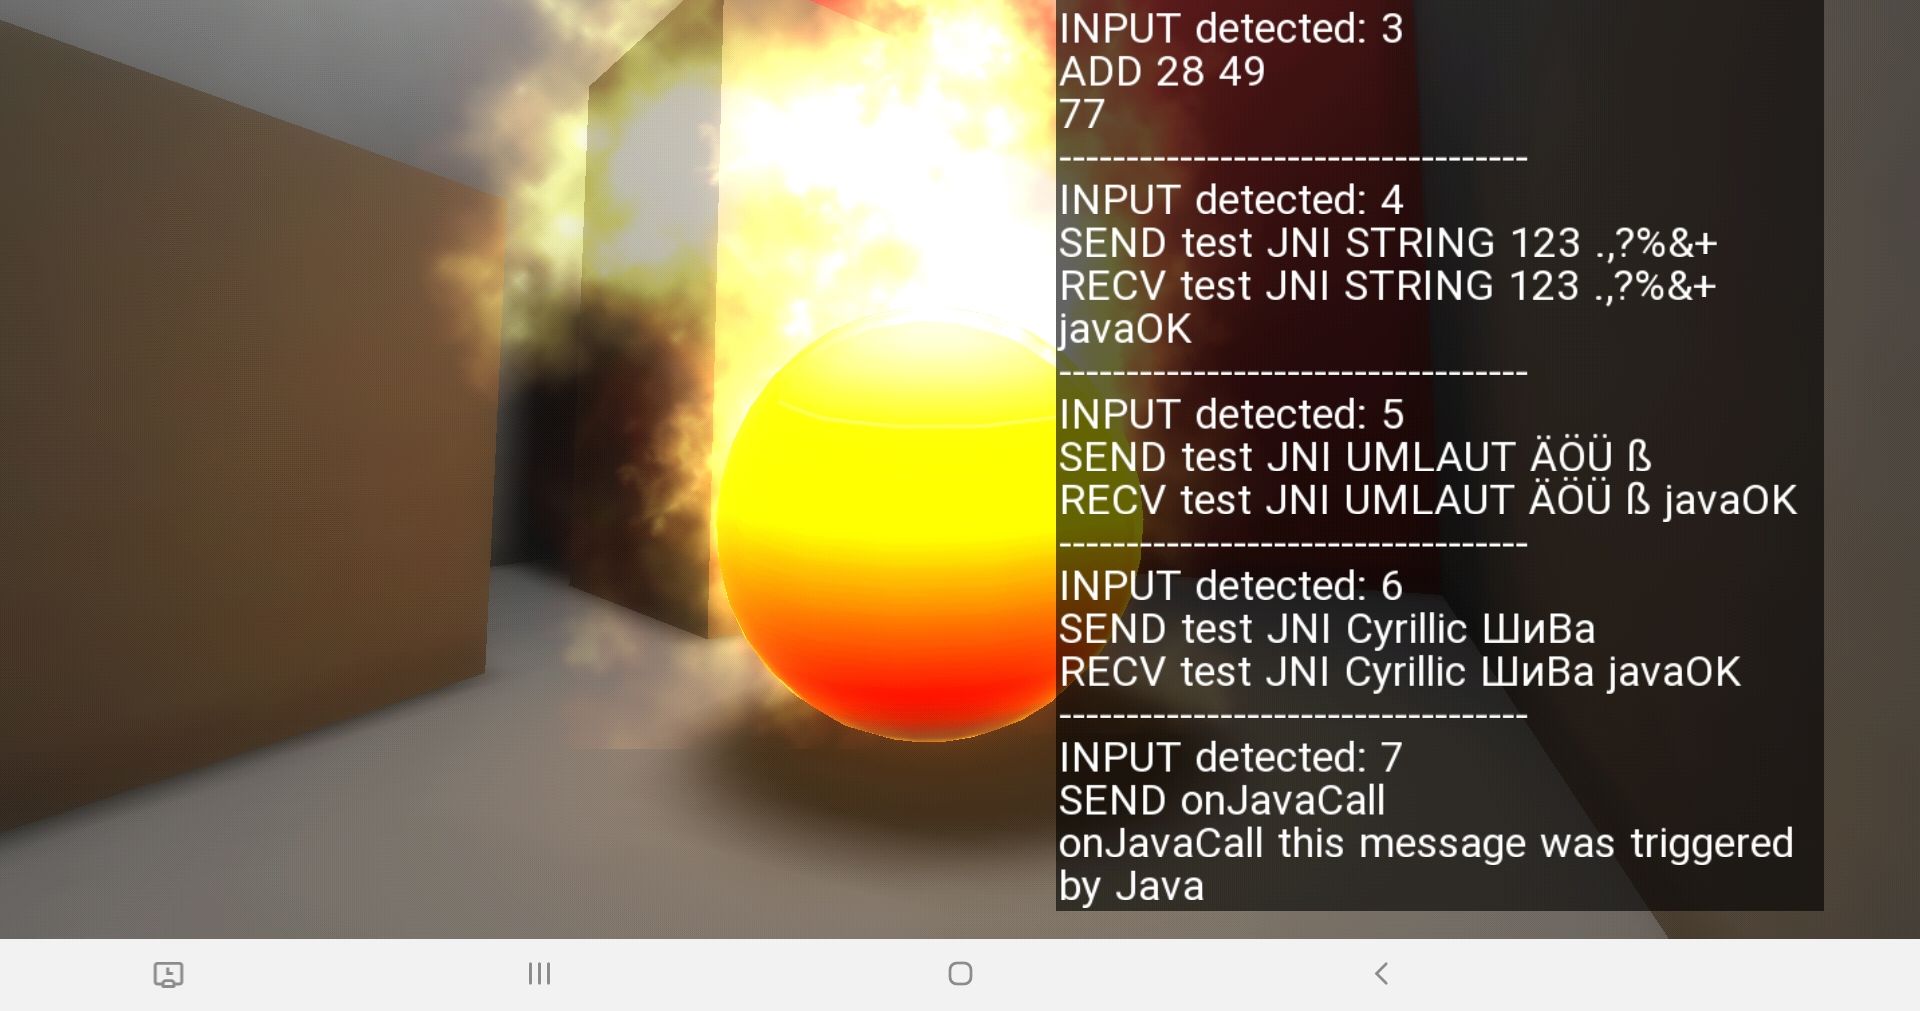
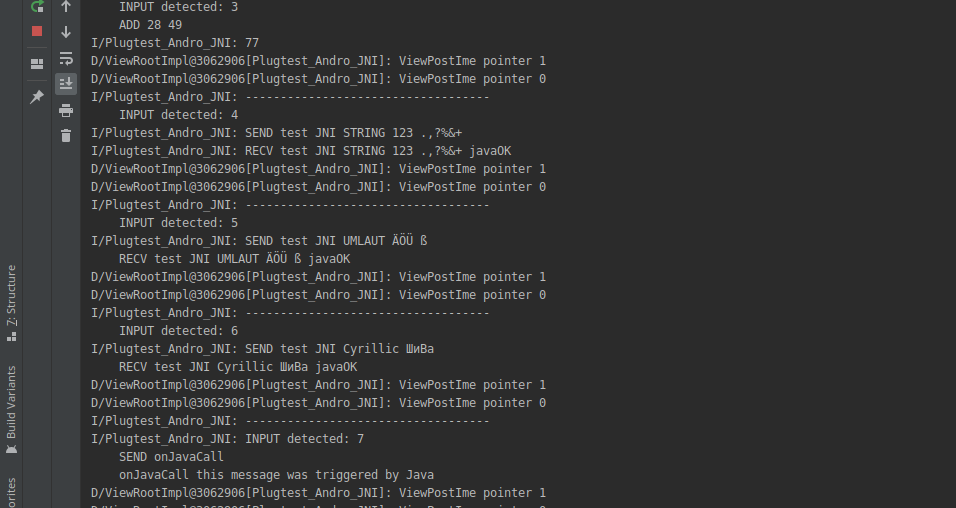
In the demo project, Input 7 triggers exactly this method and makes the ShiVa handler log a message:
Logging
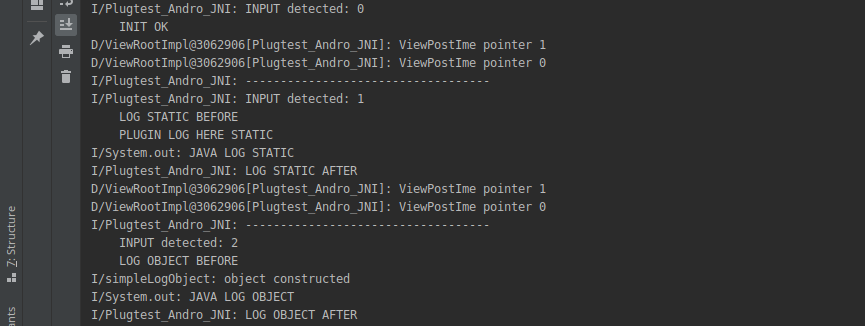
Depending on whether you are coding in Lua, C++ or Java, you have a number of ways you can log to the Android Studio Run tab. Naturally, you can use log.message() from Lua or its equivalent S3DX::log.message() from C++:
-- in an AI
log.message(“LOG STATIC HERE")
// inside a C++ plugin function
S3DX::log.message(“PLUGIN LOG STATIC HERE");
If you want to log directly to Android Studio instead of the ShiVa log, you can include the android/log.h header and make calls like these:
// inside a C++ file that includes android/log.h
__android_log_write(ANDROID_LOG_INFO, "simpleLogObject", "object constructed");
__android_log_write(ANDROID_LOG_ERROR, "simpleLogObject", "object failed");
Inside Java, you can of course use the default System.out.println() call:
// inside a java method
System.out.println(“JAVA LOG STATIC");
As you can see from the picture below, all these logs will appear in the Android Studio Run tab with their own identifiers. First comes the type of message (I for info, W for warning, E for error etc.), then the source of the log (System.out for Java, Plugtest_Andro_JNI for the name of our C++ plugin, and simpleLogObject because we used it in __android_log_write()), and after that, you get the message string:
Putting it all together
With all necessary parts in place, we need to make a test build. Since there are a lot of steps and you could easily forget a step, I suggest you work down the following list:
1. Set up the Android Export in ShiVa. Please refer to the previous tutorial regarding
architecture and SDK selection.
2. Build the Java module in Android Studio

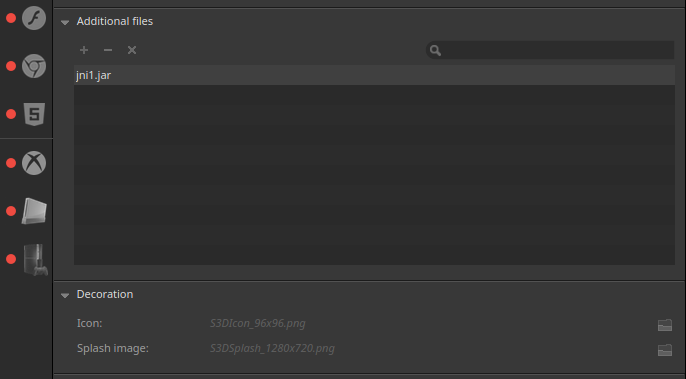
3. Copy the path of the JAR into the Additional Files tab of the ShiVa Export module
4. Clean and build your desktop project
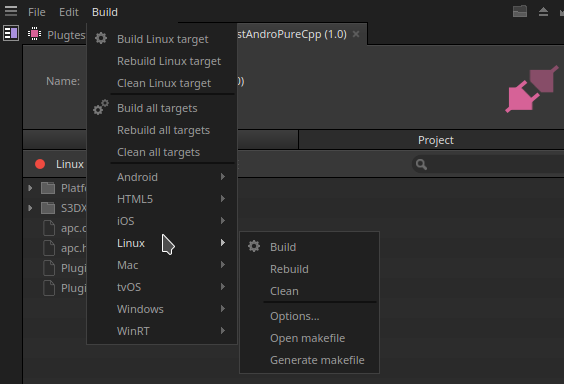
Since this is a multi-platform plugin and I used dummy code in the Linux-specific C++ files, I get the following (correct) output:

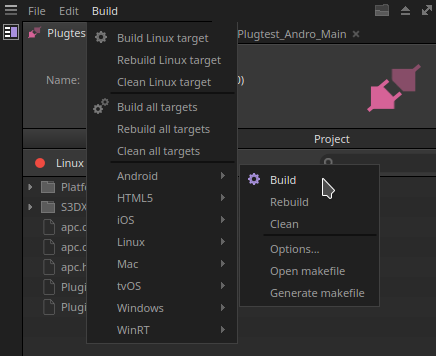
5. Clean and build the Android plugin
6. Export the game out of ShiVa as Android Studio project
7. Unzip the exported game and import it into Android Studio as a Gradle project
8. Build and test. The output should look something like this:
