Welcome to a new tutorial series for ShiVa where we will be looking at various ways to create and use plugins in your Android applications. Part 1 will cover the general setup, the creation of a test project in ShiVa and Android Studio respectively, and look at potential pitfalls in the coding pipeline. For this tutorial, I assume that you already have Android Studio installed and set up and can successfully export a ShiVa game without plugins to a test device.
ShiVa Setup
For this project, we are using a modified code sample from the 1.9.2 sample folder, mainly because of its simplicity and small size. Naturally, we will be using the latest ShiVa 2.0 beta version for the entire tutorial. The Fire sample was modified to include an on-screen logger to make debugging easier. Every time you click the mouse or touch the screen, the input will fire off a Plugtest_Andro_Main.onMouseButtonDown event, advance the test counter and perform a new test accordingly.
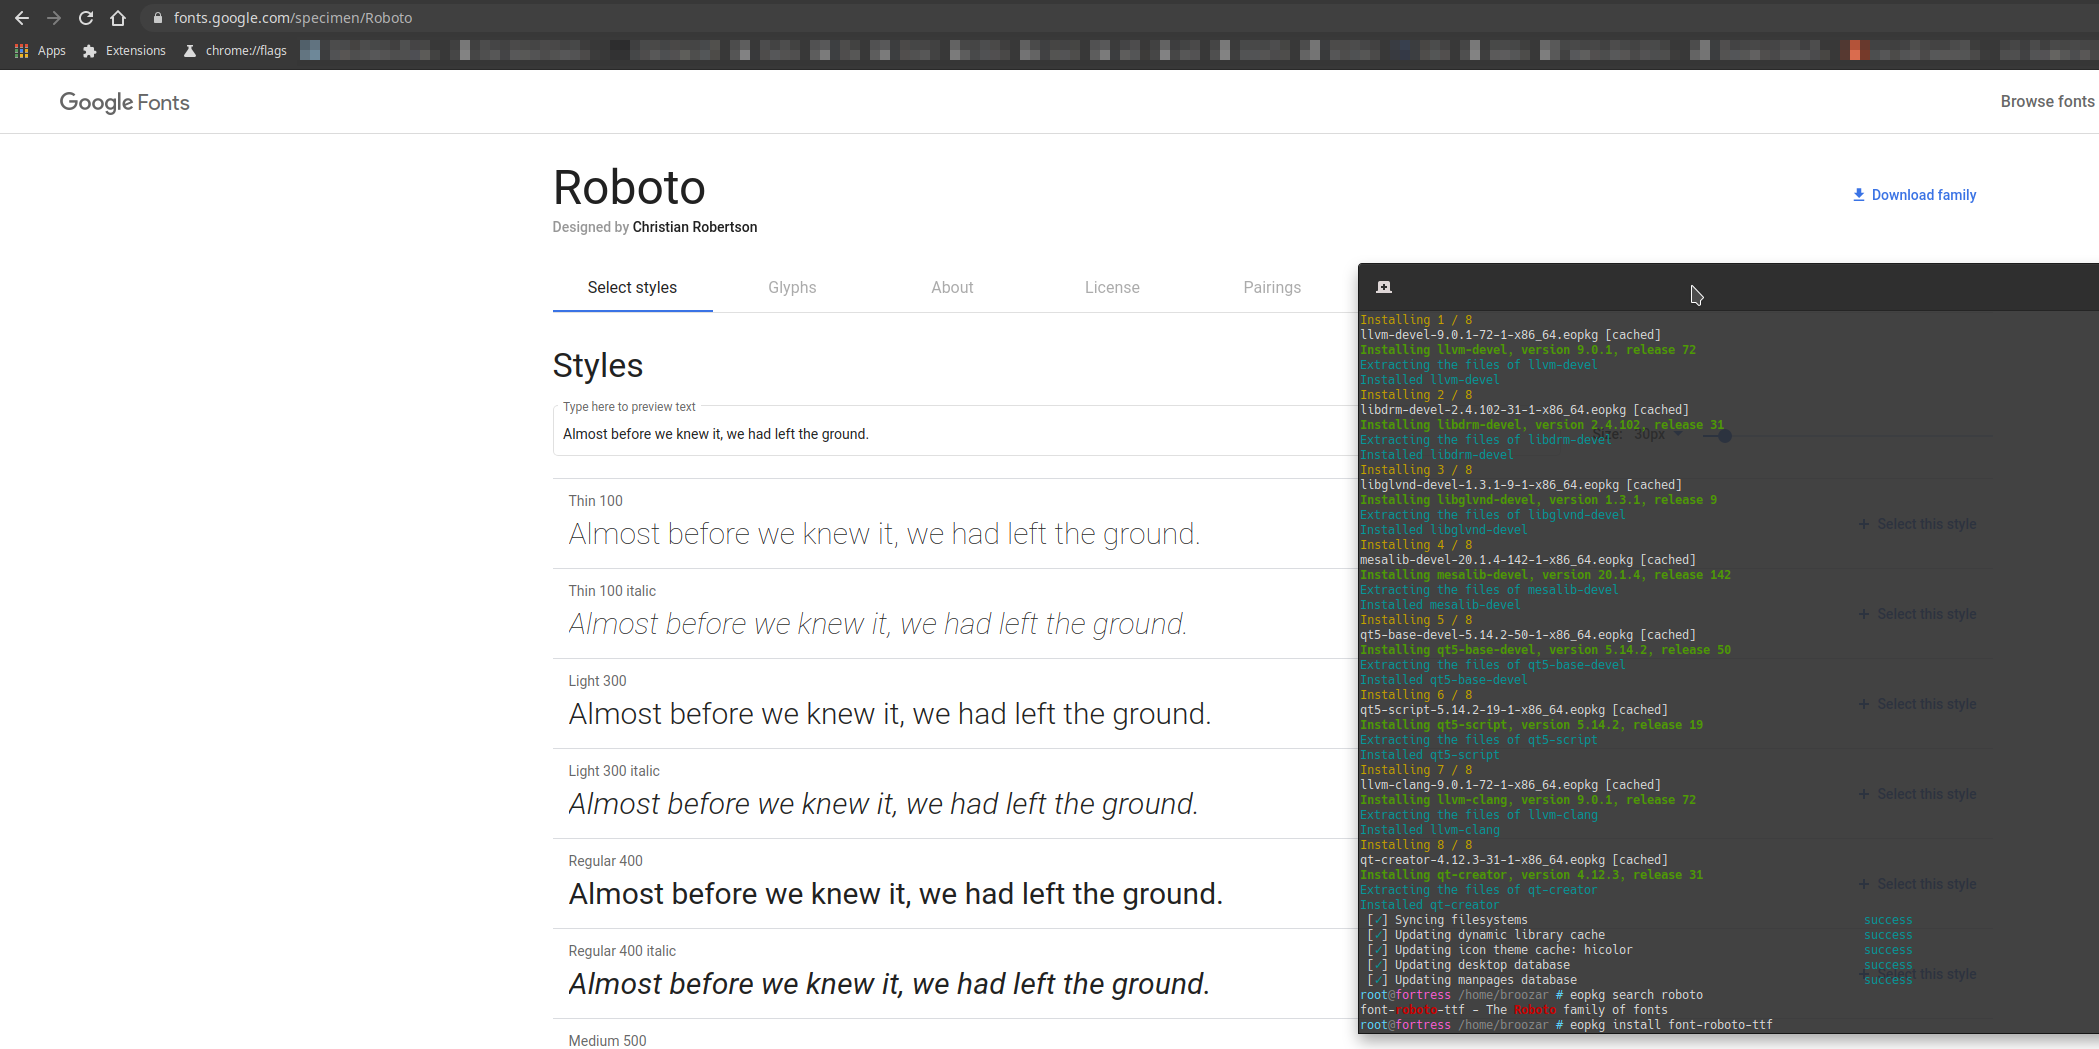
The test results are logged both to the screen as well as to the ShiVa console. In order to test UTF-8 strings, we need a font that can display all our umlaut and Cyrillic characters. I chose Roboto, a standard Google font for Android, which can either be downloaded for free from the Google fonts website, or installed with the packet manager on many Linux distributions:
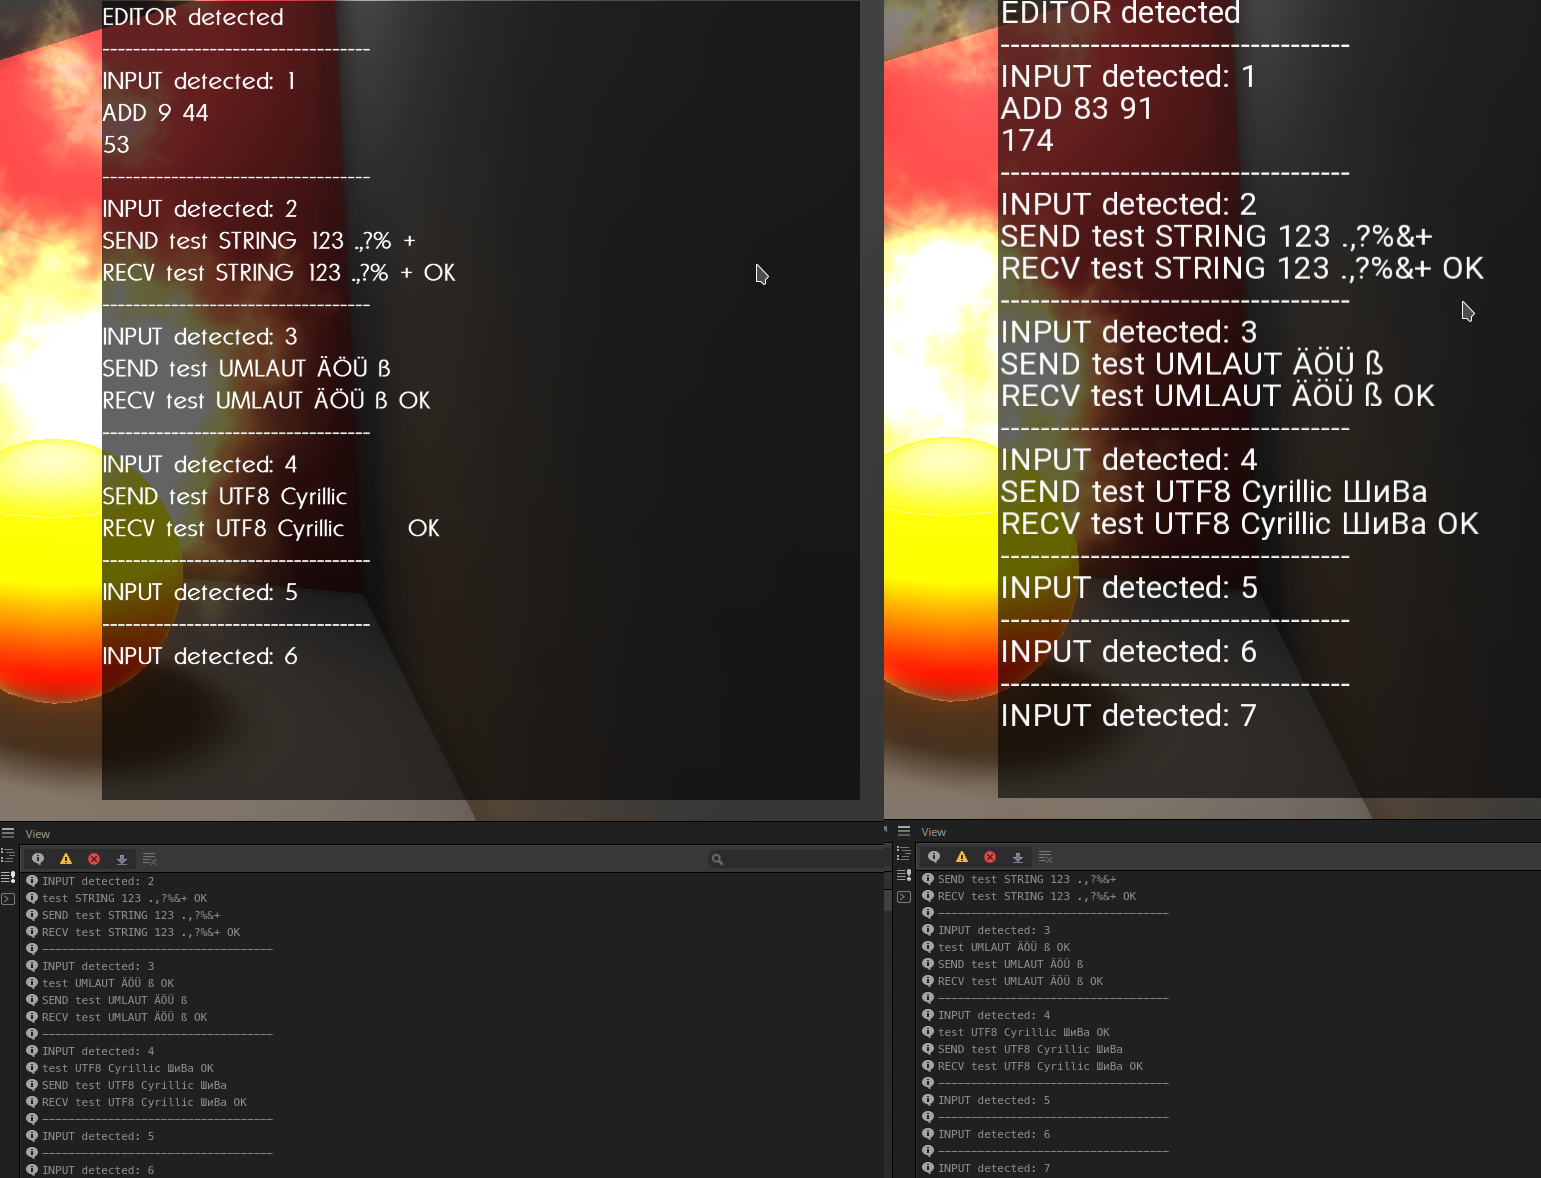
If you only use the standard ShiVa font, all characters which are not included in the font bitmap will not render, but the console will log all characters correctly. Here are the two versions side by side, one only uses the default ShiVa font, the other uses Roboto as an embedded dynamic font:
Coding the C++ Plugin
To keep things relatively simple, we will only be exchanging numbers and strings with the plugin. Numbers will be handled by the apc.add() function, which will add 2 integers together and return the result. Strings will be send through apc.strOK() which simply returns the string with an additional “OK" at the end. These functions were created using the Edit > Add function entry from the AI module menu.

Once your API is created, you can edit your C++ code either directly in ShiVa or in your favourite 3rd party IDE. As long as your IDE can import folder-based projects, your choice of IDE and platform does not really matter. For instance, the following screenshot was taken with Qt Creator on Linux, which opened the project and recognized the S3DX API flawlessly:

Compiling for the Desktop and Android
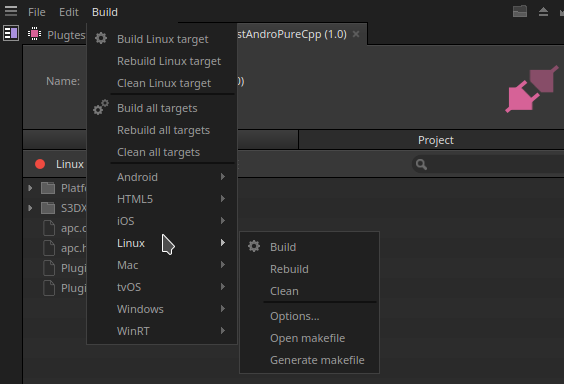
Although we are developing a plugin for Android, we still want to test our plugin locally on the desktop machine which we are working on. Luckily, this is not complicated. You can compile the plugin with a single click from ShiVa to any target platform you need. Since I am writing this tutorial on a Linux machine, I need to select Build > Linux > Build. If you are not on Linux, you will need to compile for either Windows or MacOS, depending on your desktop OS.
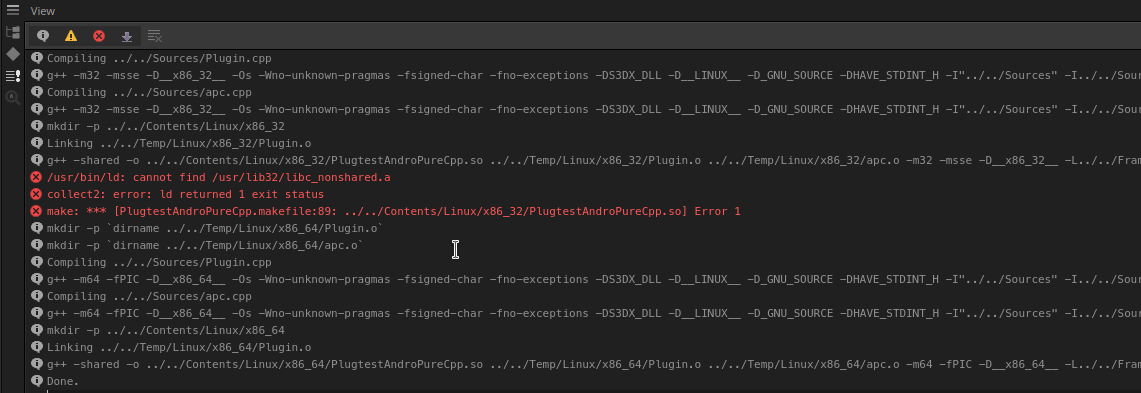
If the build from ShiVa fails on Windows or MacOS for whatever reason, you can still opt for a manual compilation from Visual Studio or Xcode. For example, ShiVa is only able to compile a 64bit Linux plugin for me, and gives an error for the 32bit version, since the 32bit compiler toolchain is not set up on my development system. This is not a problem for me since I have no intentions of testing this plugin on anything else but 64bit Linux. However, these potential problems with architecture mismatches are very important to keep in mind, especially on Android – but more on that later.
Compiling for Android is very similar. Go to to the AI module again, but instead of your desktop OS, choose Android: Build > Android > Build.
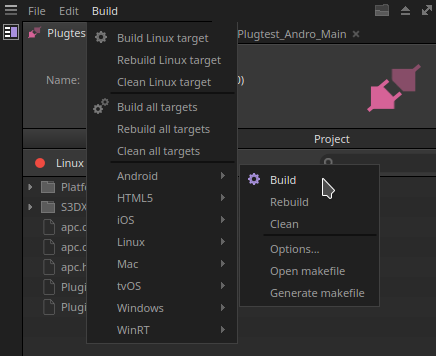
This command will try to generate plugin binaries for all supported Android architectures, the most important being v7 (32bit) and v8 (64bit). X86 Android is rather uncommon outside of testing environments, and v5 is only there for developers with special backwards compatibility requirements. If the builds for v5 or x86 fail, do not worry, because v7 and v8 will cover virtually all of your customers’ devices. The compiled binaries are stored in separate folders inside of Plugins > id > Contents > Android:

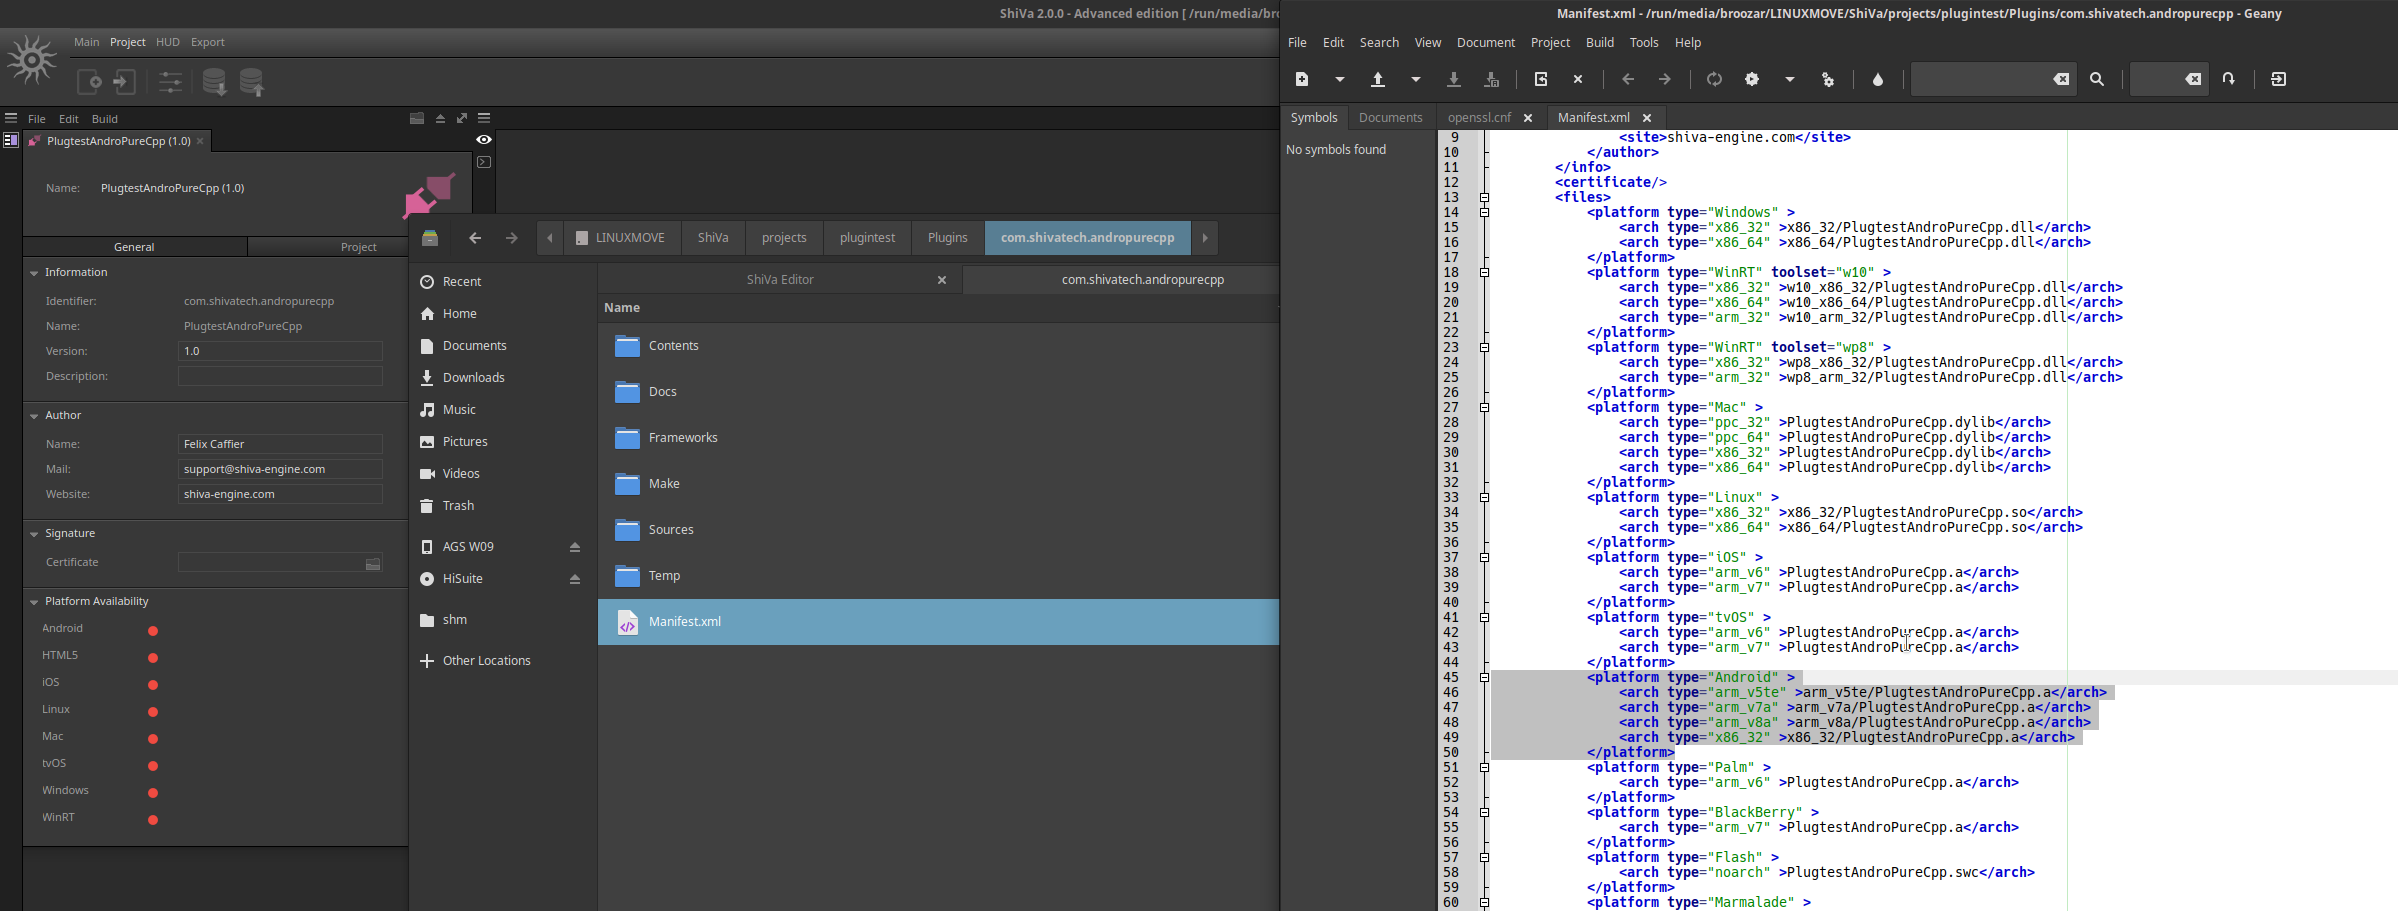
These folders correspond to the entries in the Manifest.xml file inside the Plugins folder. If you ever need to move or rename these files, create new platform entries or remove unsupported ones, you can do so here at your own risk:
A special note to Linux user who are not running Debian. If you cannot compile because of an openssl.cnf warning, create a link to the file at /usr/lib/ssl so the compiler can locate the file:

Exporting to Android Studio
The plugin works on the desktop, and you have successfully compiled your v7 and v8 Android binaries. Next, you need to get your ShiVa project into Android Studio. Even though the plugin is compiled for all supported architectures, you need to make a choice for the export: Do you want 32bit or 64bit? This largely depends on the device you want to test your game on. Sadly, you cannot assume that all modern devices run 64bit Android, even though the processor is 64bit capable. Especially on cheaper devices with low RAM, 32bit Android is still widely used for the smaller memory footprint. You also cannot rely on the brand name. I recently bought a Samsung Tab A from 2019 which still runs a 32bit version of Android.
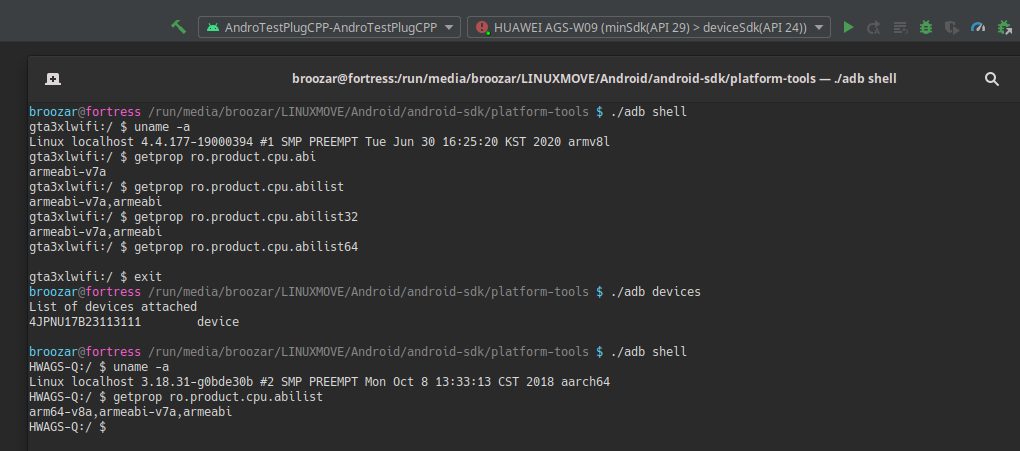
You can find out what your phone or tablet is running by connecting it to your computer via adb, which is a standard tool in the Android SDK platform tools. You can check if the device is connected and authorized through ./adb devices.

The command ./adb shell gives you access to the shell on the connected Android device. Once you are logged in, you can use the uname and especially getprop commands to find out whether your device/OS supports v7 or v8. In the screenshot below, you can see the output for two different devices, first a new but 32bit-only Samsung Tab, and second a rather old but 64bit/32bit Huawei tablet.
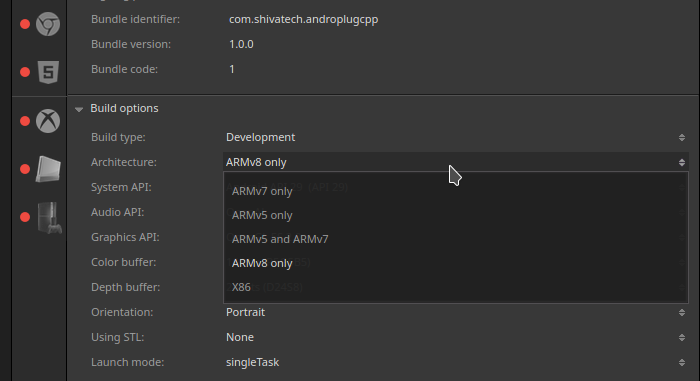
In ShiVa’s export panel, select either v7 or v8, depending on your findings.
Inside Android Studio
ShiVa exports a zipped Gradle project. Unzip this project in a location of your choice and then import it into Android Studio. If you did everything correctly, Gradle will take a few minutes to analyse and sync your project. In the top menu bar, you should see your connected test device and a green Play button on the right, like so:

If by accident you selected the wrong architecture or API level, you will get a red error message. If this is indeed the case, you need to make another export.

Before you can press the Play button, you need to make a small adjustment to the project, so it works with newer versions of the Android NDK. Open External Build Files > android.toolchain.cmake and add a new linker flag around line 479:
list(APPEND ANDROID_LINKER_FLAGS -Wl,--allow-multiple-definition)
It should look something like this:

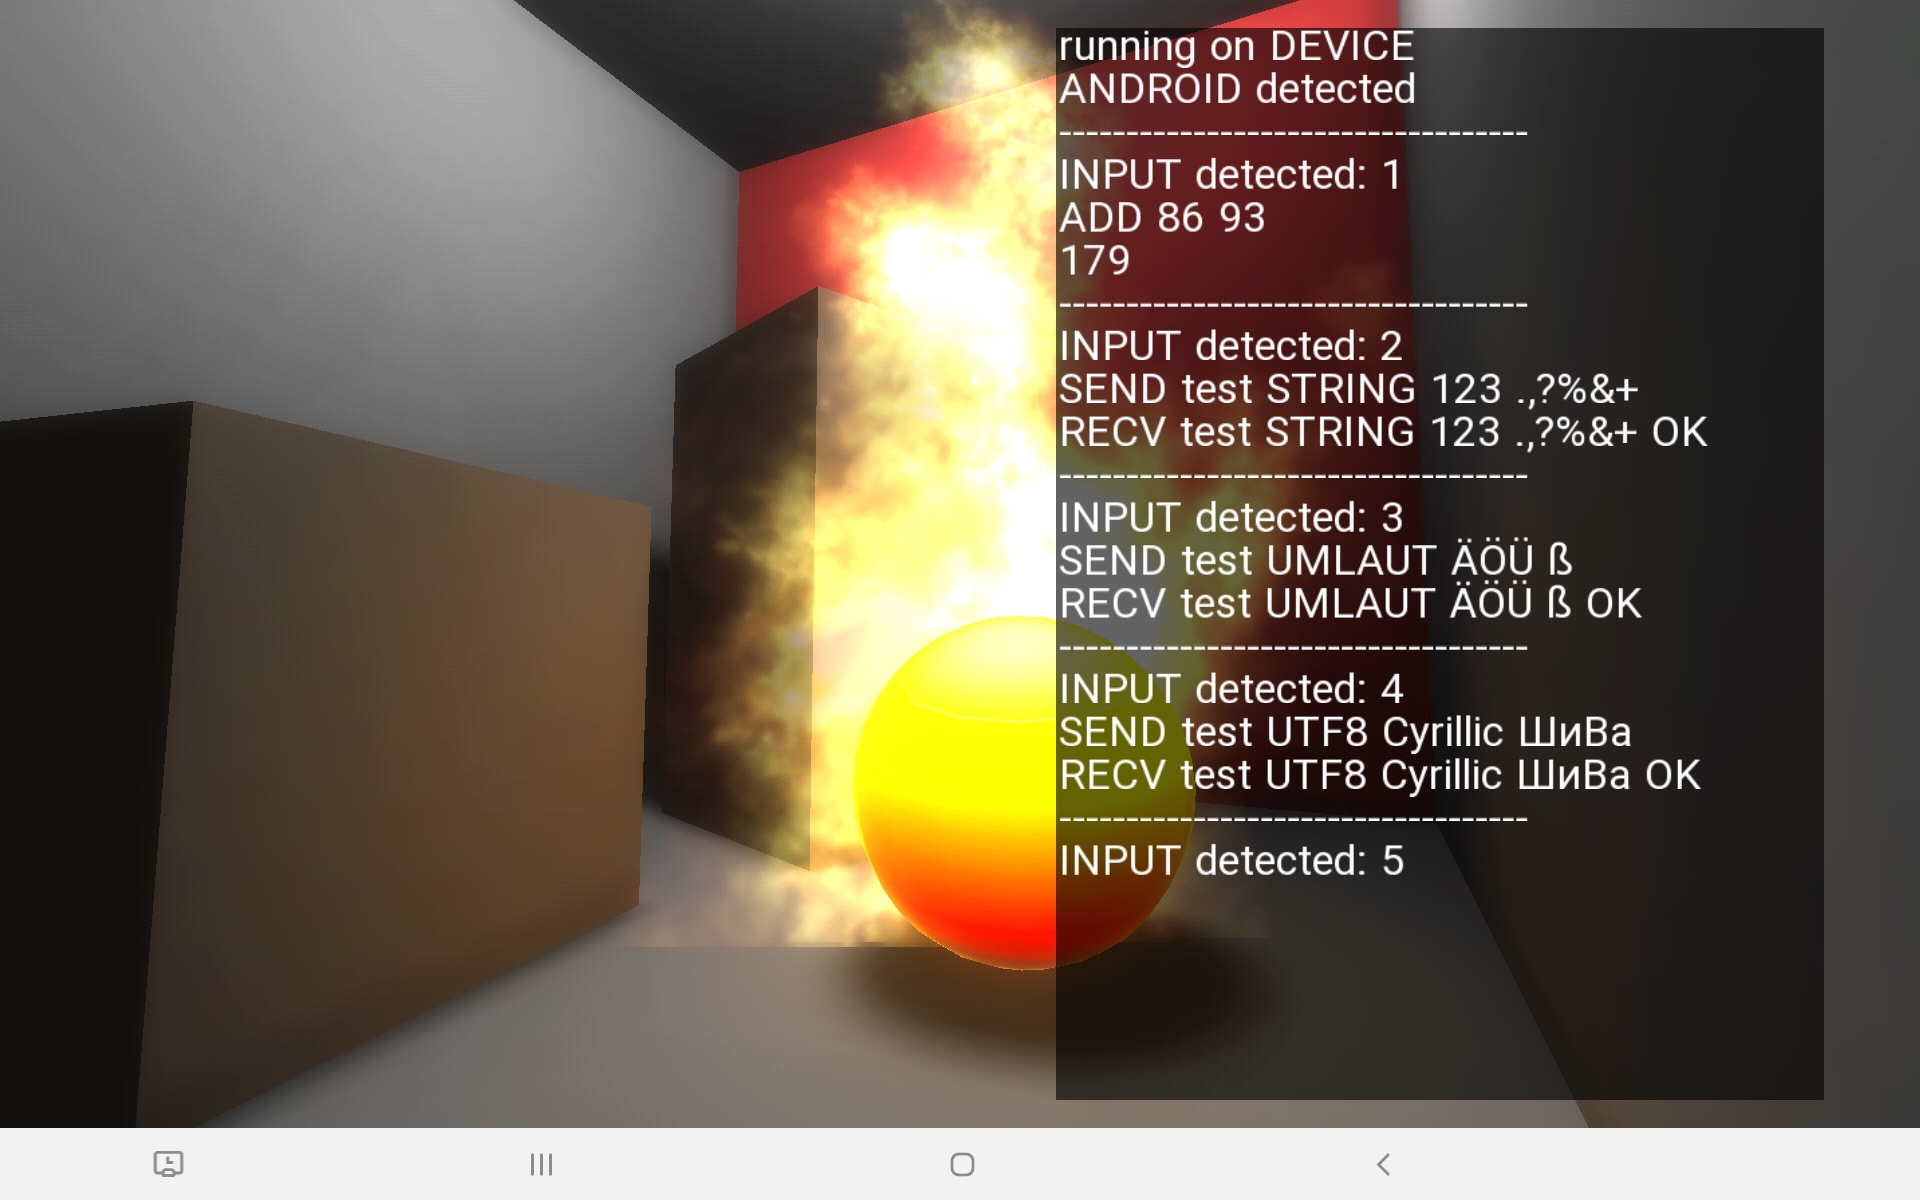
Now you are ready to hit the Play button, which will build your project, install it on the connected test device, and run it. Touching the screen should go through each test step by step:
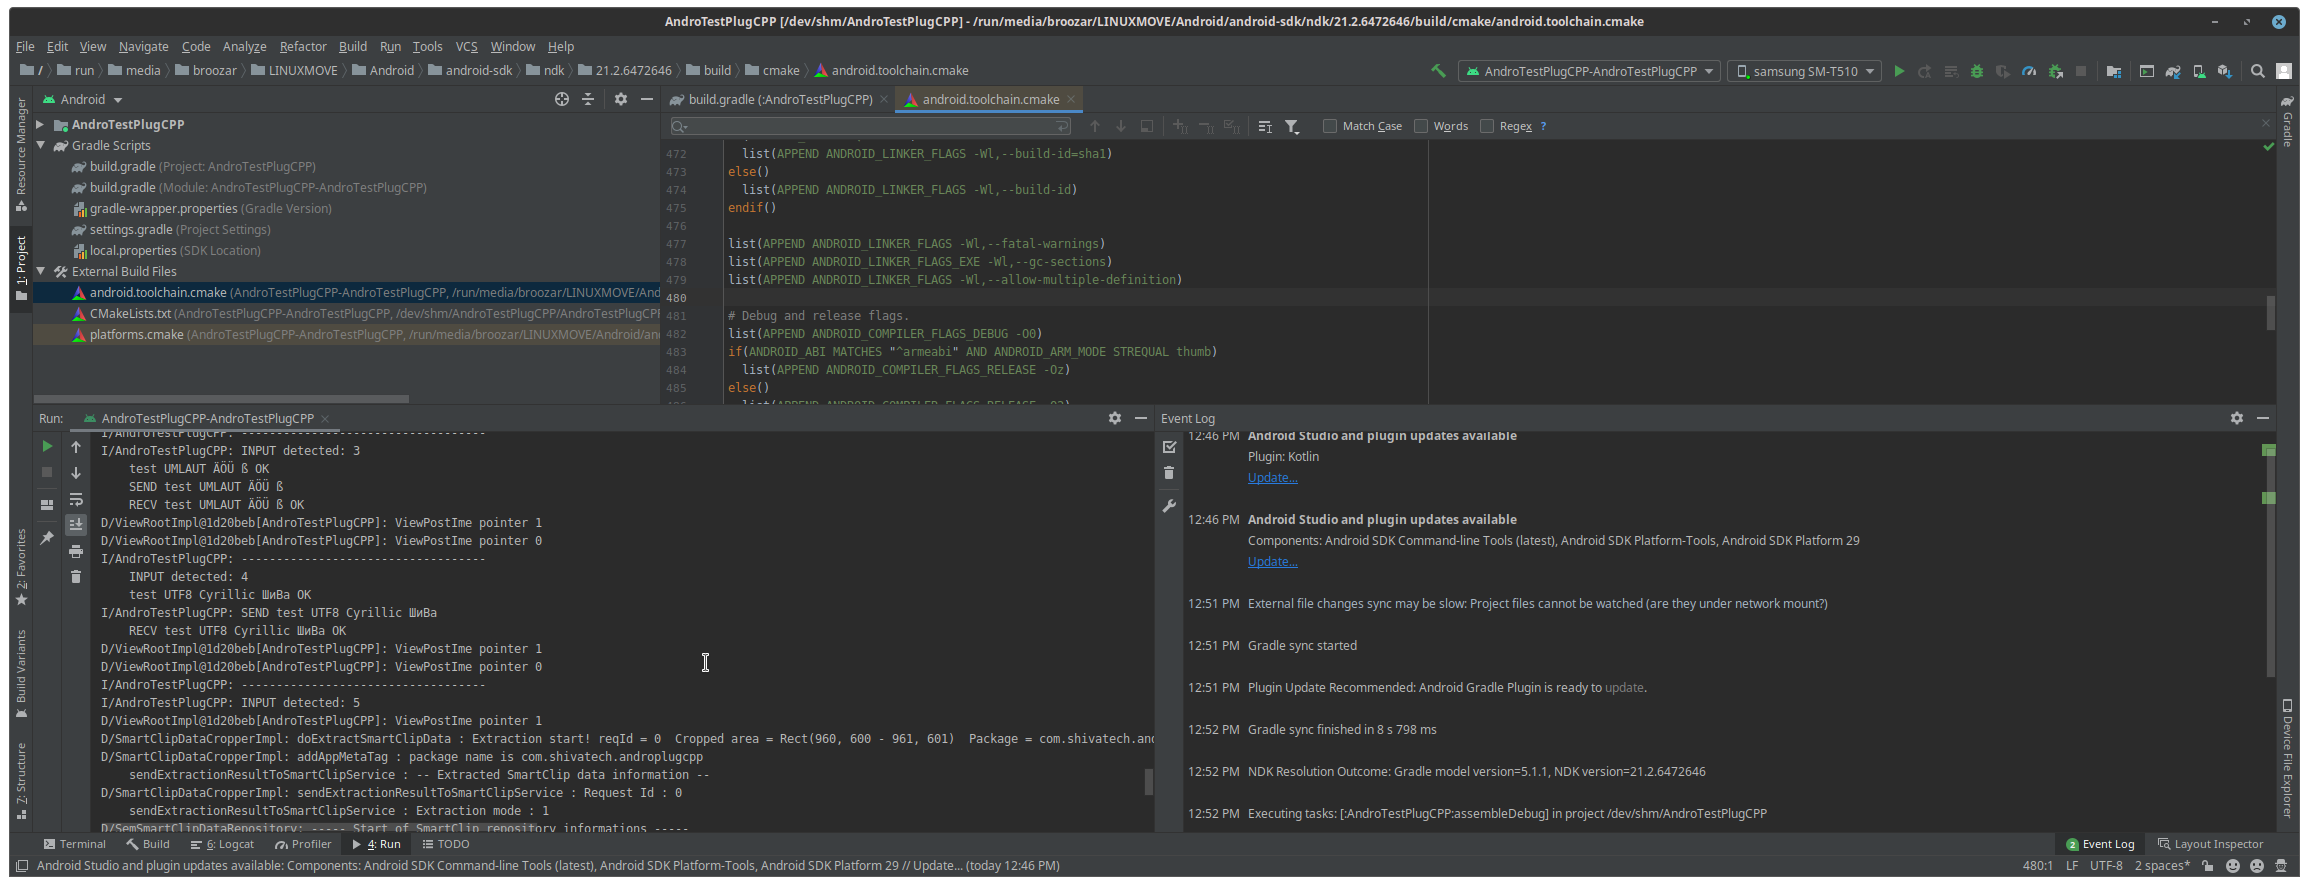
Console logs are kept at the Run tab in the lower right corner in Android Studio. As you can see, UTF-8 strings are no problem here either.
I hope you enjoyed the first part of this tutorial series and will come back for part 2 where we will have a look at JNI and JAR files.